Saturday, February 20, 2010

Indian Flat Bread

Indian flatbread in front of mirror

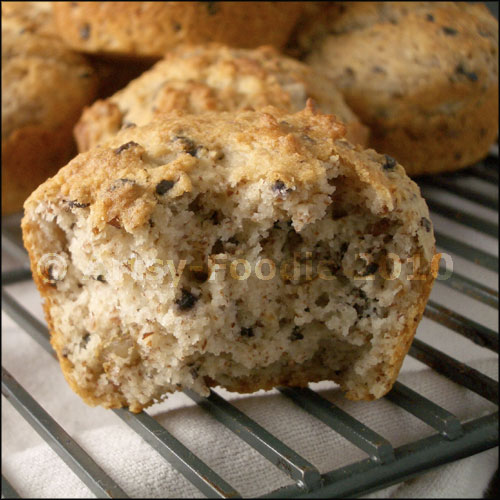
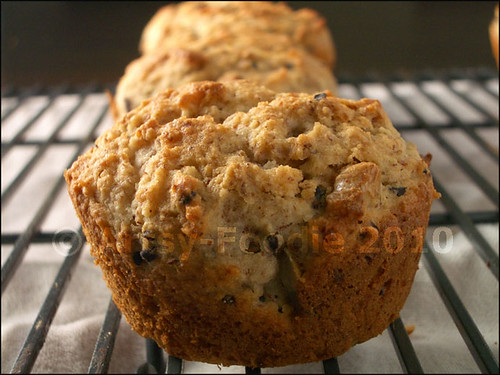
It's been a busy week.  Cooking and baking is a way for me to relax and get centered when my schedule gets too hectic.  It slows me down and grounds me to what's truly important: my family.  I know that if I cook Indian food, it will put a smile on their faces.   Over the years, we have savored many dishes inspired by this flavorful cuisine. 

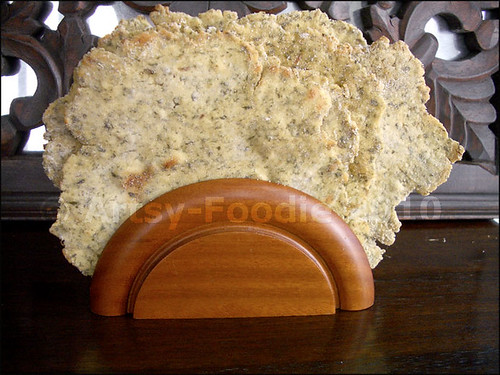
Usha of Veg Inspirations has a recipe for an Indian flat-bread called Besan Roti on her wonderful blog.    The breads are especially delicious and pair up perfectly with the many vegetable stews that Indian cooks make. Flatbread, especially, can be adapted successfully for the gluten free kitchen.


Indian Flatbread with Goat Cheese

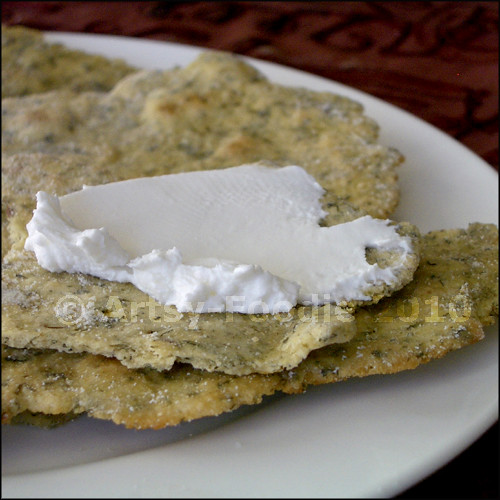
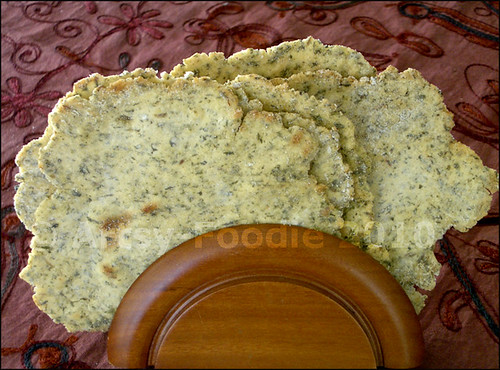
I had no problem altering Usha's recipe to make it gluten free.  I suspect that her final product was more malleable than mine because it contained gluten.  My Indian Chickpea Flatbread was more like a soft cracker bread.  I also changed the spices a little because I love cumin seeds so much.  The result was a wonderfully flavored flat bread, easy to make and hard to resist.  It goes really well with a goat cream cheese, or tomato salad and of course your favorite dhal (Indian lentil stew).  This was a definite winner with all my kids.

Don't miss a single recipe--subscribe to Artsy-Foodie using the tool at the top right of the screen and receive Artsy-Foodie in a convenient email newsletter.

Indian Flatbread Fan

Indian Chickpea Flatbread
(serves 6)

1/2 cup tapioca Starch
1/2 cup millet flour
1 cup chickpea flour
1/4 tsp xantham gum
1/4 tsp ajwain seeds (optional)
1/2 tsp cumin seeds
1/2 tsp sea salt

1 tsp vegetable oil

1/2 cup cold water

1/4 cup chopped cilantro


  • Mix all the dry ingredients in a bowl
  • Make a well in the center of the flour mixture and add the water and oil.  Mix with a fork.
  • Add the chopped cilantro
  • Incorporate the flour and water/oil together.
  • The dough should be smooth but moist.  Cover the bowl with a towel and let rest for 30 minutes. 
  • Form dough into golf size balls.
  • Put a pan on medium heat, then coat with a thin layer of oil.
  • Flatten each ball into a thin disk and fry on each side until slightly golden (about three minutes) 
Printable Recipe

Friday, February 12, 2010

Sweets for Your Sweetie

pie mocha heart

Valentines Day is as good an occasion as any to share some memorable food with the people you love.  I've put together a list of spectacular desserts to celebrate with your valentine:


caramel choco pear spoon


Chocolate Hazelnut Stuffed Figs


lemon meringue cupcake platter


Wishing you and your sweetie a wonderful Valentines Day!

Don't miss a single recipe--subscribe to Artsy-Foodie using the tool at the top right of the screen and receive Artsy-Foodie in a convenient email newsletter.

Monday, February 8, 2010

Apple Cranberry Tart with Super Easy Crust

Apple cranberry tart

People who are too intimidated to make pie will tell you that their Achilles' heel is the crust.  I confess that I too have uttered my fair share of French words in the process of making pies in the past--but no more.

Apple tart sliced


This recipe will make a pro out of you.  It requires very little in terms of effort: no rolling, no chilling.  All you need to make a melt-in-your-mouth pie crust is a strong wrist or a food processor and tart pan with a removable bottom and voila: perfection every time!


I made this apple tart shiny and appetizing by glazing it with apricot jam.  It's a simple baker's trick that can turn an apple tart from nice enough to stunning.  The cranberries add a visual contrast but feel free to omit them if you don't have any on hand.

Don't miss a single recipe--subscribe to Artsy-Foodie using the tool at the top right of the screen and receive Artsy-Foodie in a convenient email newsletter.

apple cranberry tart top view

Apple Cranberry Tart with Easy Crust (serves 6-8)
This tart is gluten free but since it is loosely based on a crust I found in an old issue of Bon Appetit Magazine, I am sure it would turn out delicious with regular all purpose flour as well--just make sure that no one at your table is sensitive to gluten or wheat.

For the Crust:
1/4 cup coconut oil or room-temperature butter (unsalted)
1/4 cup raw sugar
small pinch of salt
3 large eggs beaten
1 tsp vanilla extract
1/4 cup coconut flour
1/4 cup tapioca flour
1/2 cup brown rice flour

For the Filling:
2-3 apples, peeled and quartered and then thinly sliced
1/4 cup of frozen cranberries
1/3 cup apricot jam

  • Preheat oven to 375F and place a cookie sheet on the bottom rack.
  • Oil a 9" diameter removable bottom tart pan.
  • In the food processor mix together the coconut oil (or butter), the sugar, and salt, scraping the sides as needed, until the mixture is creamy and uniform.
  • Add the eggs, vanilla and process some more until well combined.
  • Add the flours and pulse until just combined.
  • Carefully remove the blade from the machine and transfer the batter to the middle of the prepared pan.
  • With your hand slightly wet, pat the batter down to form an even crust.
  • Arrange the slices in a circular pattern and sprinkle the cranberries on top.
  • Heat the apricot jam slightly until it becomes more liquid and transfer to a mug.  Using a pastry brush, paint the jam generously all over the apples and cranberries and reserve the rest for later.
  • Bake the pie for 45 minutes.
  • Remove from the oven. Warm the remaining jam again and apply a generous coating all over the fruits.  Let cool completely on a rack.
Printable Recipe
    Apple tart with cranberries slice
    Only one slice left!

    Friday, February 5, 2010

    Almond Muffins with Cocoa Nibs

    almond muffins with cocoa nibs close-up

         I started using cocoa nibs in my baking a little over a year ago.  I especially like the nutty texture and slightly bitter chocolate taste they impart to my muffins.  These little bits of goodness are made of the  roasted cocoa bean that has been separated from its husk but not yet turned into the form we are so familiar with: powder, bars, chips etc.  They add a hint of chocolate taste without the overwhelming sweetness that often accompanies chocolate chips.

         These little muffins are wonderful for an afternoon pick-me-up or breakfast in a hurry.  They have just enough sweetness to make them feel like a treat.  The sugar provides the perfect counterbalance to the slight bitterness of the cocoa nibs.  The best part is they come together in no time!


    Don't miss a single recipe--subscribe to Artsy-Foodie using the tool at the top right of the screen and receive Artsy-Foodie in a convenient email newsletter.

    almond muffins with cocoa nibs

    Almond Muffins with Cocoa Nibs
    (makes 12)

    1 cup almond meal
    1/2 cup millet flour
    1/2 cup brown rice flour
    1 tbsp GF baking powder
    1/3 cup raw sugar
    1/4 tsp xantham gum powder 

    1/2 cup plain yogurt or soy yogurt
    1/2 cup milk, soymilk or almond milk
    2 tbsp walnut oil or vegetable oil
    1/3 cup egg whites
    1/2 tbsp vanilla extract
    1/4 cup cocoa nibs
    1/2 cup walnut pieces (optional) 

    • Oil a 12 cup muffin pan.
    • Preheat oven 375F.
    • Mix the first 6 (dry) ingredients thoroughly in a large bowl.
    • Mix the next five ingredients (yogurt-vanilla extract) in a medium bowl.
    • Stir the resulting two mixtures together until just combined.
    • Add the cocoa nibs and walnuts (if using).
    • Mix a few times to distribute nibs and nut pieces evenly.
    • Divide the batter evenly among the muffin cups.
    • Bake for 20 minutes.  The tops of the muffins will be golden when they're ready.
    • Enjoy fresh out of the oven or let cool on a rack.

    Printable Recipe

    Tuesday, February 2, 2010

    Picadillo with Sauteed Almonds

    Picadillo bowl

    Picadillo is a Cuban dish.  This recipe is probably not very authentic but it makes for one delicious meal.  I have adapted it from a wonderful cookbook called: The 150 Best Slow Cooker Recipes.  My friend Marieke gave me the book as a gift years ago and I have been putting it to good use ever since.


    This is ideal for a family meal or for company.  The leftovers are only enhanced the next day as the flavors mingle together and the ingredients become good friends.  Leftovers are rare when I make Picadillo, though:  it's just too delicious.

    I made it with buffalo meat instead of my usual grass-fed beef.  Although I usually make it in the slow cooker, this time I made a few changes to try it on the stovetop.  It turned out beautifully!

    Don't miss a single recipe--subscribe to Artsy-Foodie using the tool at the top right of the screen and receive Artsy-Foodie in a convenient email newsletter.

    Picadillo plate close-up

    Picadillo with Sauteed Almonds (serves 6)
    Serve this wonderful dish with brown rice and sauteed greens.  I especially love sauteed collard greens with garlic.

    1 tbsp olive oil
    2 lbs ground buffalo  (or lean grass-fed beef)
    2 tbsp of minced garlic
    2 tsp oregano leaves
    1 tsp sea salt
    1/4 tsp ground cinnamon
    1/4 tsp ground cloves
    1 bay leaf
    1 can 6 oz tomato paste + 1 can-worth of hot water
    2 tbsp red wine vinegar
    12 pimiento-stuffed olives, halved
    1/2 cup slivered almonds
    1 tsp olive oil

    • Heat 1 tbsp olive oil in a large pot and brown the meat under medium to high heat.
    • Add the garlic, oregano, salt, cinnamon, cloves, bay leaf, tomato paste and water, red wine vinegar.
    • Mix well, bring to a boil, and reduce the heat to a simmer and cover.
    • Simmer for 20 minutes
    • Add the olives and continue simmering for 10 more minutes.
    • In a small pan, heat the 1 tsp of oil and add the almonds.  Saute until golden and remove from the heat immediately.
    • Sprinkle sauteed almonds on meat mixture and serve immediately.
    Printable Recipe


    Picadillo in plate
    Enjoy!
    Related Posts with Thumbnails